Commands Reference
This chapter lists almost all of Leo's commands. It starts with a discussion of the Emacs-like minibuffer.
Using the minibuffer
Use Alt-X to open the minibuffer input box. You use the minibuffer to execute commands by name.
Every Leo command has a command name. In this document, keystrokes that invoke a command will be followed by the command name in parentheses. For example, Ctrl-S (save-file) saves a Leo file.
💡 TIP
Leo has hundreds of commands, but because of auto-completion you do not have to remember, or even know about any of them. Feel free to ignore commands that you don't use.
The following prefixes help find commands by name:
| Prefix | Category |
|---|---|
| clone-find | clone-find commands |
| file- | file commands |
| find- | find commands |
| isearch- | incremental search commands |
| leo- | open .leo files |
| open- | open files or url's |
| print- | print commands |
| rectangle- | rectangle commands |
| sort- | sort commands |
| toggle- | toggle settings commands |
Most important commands
File operations & sessions
Here are Leo's basic file commands:
Ctrl-N (new)
Creates a new outline in a new tab.
Ctrl-O (open-outline)
Opens an existing .leo file.
Ctrl-S (save-file)
Saves the outline.
Switching focus
Here's how to switch focus without using the mouse:
Alt-T (focus-to-tree)
Puts focus in the outline pane, regardless of focus.
Ctrl-T (toggle-active-pane)
Toggles focus between the outline and body panes.
Ctrl-Tab (tab-cycle-next)
Switches between outline tabs. You may open multiple Leo outlines in
different tabs within the same main window.
Ctrl-G (focus-to-body)
Puts focus in the body pane.
Outline commands
Ctrl-I or Insert (insert-node)
Inserts a new node into the outline.
Ctrl-H (edit-headline)
Begins editing the headline of the selected node.
Return
When focus is in the outline pane, Return switches focus to the body pane.
Ctrl-Shift-C (copy-node)
Copies the outline and all it's descendants, placing the node on the clipboard.
Ctrl-Shift-X (cut-node)
Cuts the outline and all its descendants, placing the node on the clipboard.
Ctrl-Shift-V (paste-node)
Pastes a node (and its descendants) from the clipboard after the presently selected node.
Ctrl-M (mark)
Toggles the mark on a node. Marked nodes have a vertical red bar in their icon area.
Ctrl-} (demote)
Makes all following siblings of a node children of the node. Use demote to "gather" nodes so they can all be moved with their parent.
Ctrl-{ (promote)
Makes all the children of a node siblings of the node. Use promote to "scatter" the nodes after moving their parent.
Selecting outline nodes
You may select, expand and contract outline nodes with the mouse as usual, but using arrow keys is highly recommended. When focus is in the outline pane, plain arrows keys change the selected node:
Right-arrow (expand-and-go-right)
Expands a node or selects its first child.
Left-arrow (contract-or-go-left)
Contracts a node if its children are visible, and selects the node's parent otherwise.
Up-arrow (goto-prev-visible)
Selects the previous visible outline node.
Down-arrow (goto-next-visible)
Selects the next visible outline node.
Regardless of focus, Alt-arrow select outline nodes:
Alt-Home (goto-first-visible-node)
Selects the first outline node and collapses all nodes.
Alt-End (goto-last-visible-node)
Selects the last visible outline node and collapses all nodes except the node and its ancestors.
Alt-arrow keys
Select the outline pane, and then act just like the plain arrow keys when the outline pane has focus.
Finding & replacing text
This section explains how to use Leo's standard search/replace commands.
📌 NOTE
you can also use the Nav Tab (in the Log pane) to search for text.
Ctrl-F (start-search) shows the Find Tab and puts the focus in the text box labeled Find:.
💡 TIP
You can select radio buttons and toggle check boxes in the Find Tab withCtrl-Alt keys. The underlined letter of the radio buttons or check boxes indicate which key to use. For example,Ctrl-Alt-X (toggle-find-regex-option)toggles the regexp checkbox.
After typing Ctrl-F, type the search string, say def, in the text box.
Start the find command by typing <Return>.
But suppose you want to replace def with foo, instead of just finding def.
Just type <Tab> before typing <Return>. Focus shifts to the text box labeled Replace:.
Finally, type <Return> to start the find-next command. When Leo finds the next instance of def, it will select it.
You may now type any command. The following are most useful:
Ctrl-minus (replace-then-find)replaces the selected text.F3 (find-next)continues searching without making a replacement.F2 (find-previous)continues the search in reverse.
Formatting text
rst3
Converts @rst nodes to restructured text. This command automatically creates underlining for rST sections. To reorganize a document, just reorganize the corresponding Leo outline: you don't have to change markup by hand. Search or "rst" in leoSettings.leo to see the pertinent settings.
adoc
Converts @adoc nodes to asciidoc text. This command automatically creates markup for asciidoctor sections. To reorganize a document, just reorganize the corresponding Leo outline: you don't have to change markup by hand.
Undoing and redoing changes
Leo has undo and redo commands -- Leo remembers changes you make to outline structure or the contents of any node since you restarted Leo or made a non-undoable operation.
Ctrl-Z (undo)
Undoes the last change. Another Ctrl-Z undoes the previous change, etc.
Ctrl-Shift-Z (redo)
Undoes the effect of the last undo, etc.
Clone-find commands
The clone find commands, cfa and cff are extraordinarily useful. These commands move clones of all nodes matching the search pattern under a single organizer node, created as the last top-level node. Flattened searches put all nodes as direct children of the organizer node:
| Short | Full Name |
|---|---|
| cfa | clone-find-all |
| cff | clone-find-all-flattened |
The clone-marked commands move clones of all marked nodes under an organizer node. Especially useful for gathering nodes by hand:
| Short | Full Name |
|---|---|
| cfam | clone-find-marked |
| cffm | clone-find-flattened-marked |
Syncing @clean files
The check-nodes command finds dubious nodes, that is, nodes that:
- contain multiple defs.
- start with leading blank lines.
- are non-organizer nodes containing no body text.
This command is specially useful when using @clean nodes in a collaborative
environment. Leo's @clean update algorithm will update @clean nodes when
others have added, deleted or moved code, but the update algorithm won't
assign changed code to the optimal nodes. This script highlights nodes that
needed attention.
Settings: You can customize the behavior of this command with @data nodes:
- @data check-nodes-ok-patterns
The body of the @data node contains a list of regexes (strings), one per line. This command compiles each regex as if it were a raw string. Headlines matching any of these compiled regexes are not considered dubious. The defaults ignore unit tests:
.*test_
.*Test
- @data check-nodes-ok-prefixes
The body of the @data node contains a list of strings, one per line. Headlines starting with any of these strings are not considered dubious. The defaults ignore top-level @<file> nodes and marker nodes:
 @
 **
 ==
 --
- @data check-nodes-suppressions
The body of the @data node contains a list of strings, one per line. Headlines that match these suppressions exactly are not considered dubious. Default: None.
Help commands
help-for-command
Shows the documentation for any Leo command. This prompts for the name of a Leo command. Use tab completion to see the list of all commands that start with a given prefix.
show-settings
This command clarify which settings are in effect, and where they came from.
These commands discuss special topics:
help-for-settingshelp-for-keystrokehelp-for-scriptinghelp-for-minibufferhelp-for-find-commandshelp-for-creating-external-files
All other commands
Clone-find commands
The clone find commands, cfa and cff, move clones of all nodes matching the search pattern under a single organizer node, created as the last top-level node. Flattened searches put all nodes as direct children of the organizer node:
| Short | Full Name |
|---|---|
| cfa | clone-find-all |
| cff | clone-find-all-flattened |
The clone-marked commands move clones of all marked nodes under an organizer node. The clone-find-tag aka 'cft' command creates clones of all nodes having a given tag. Especially useful for gathering nodes by hand.
| Short | Full Name |
|---|---|
| cfam | clone-find-marked |
| cffm | clone-find-flattened-marked |
| cft | clone-find-tag |
clone-find-parents
Creates clones of all parent nodes of c.p.
tag-children
Applies a given tag to all the children of the selected node.
Edit commands
Cutting, pasting and selecting text
cut-text (Ctrl-X)
Cut the selected text and put it to the clipboard.
copy-text (Ctrl-C)
Copy the selected text to the clipboard.
paste-text (Ctrl-V)
Paste test from the clipboard.
select-all (Ctrl-A)
Select all text in the text pane.
These commands work with either headline or body text.
Indenting body text
always-indent-region
Shift selected lines right one tab position. Inserts one unit of indentation if no text is selected.
indent-region (Tab)
Shift selected lines right one tab position. Inserts a tab (or spaces) if no text is selected.
unindent-region (Shift-Tab)
Shifts selected lines left one tab position. Deletes one unit of indentation if no text is selected.
Moving the cursor
goto-global-line (Alt-G)
Selects the locations in your outlines corresponding to a line in a external file.
Text formatting commands
clean-lines
Removes trailing whitespace from all lines, preserving newlines.
clear-selected-text
Delete the selected text.
convert-tabs
Converts leading tabs to blanks in a single node.
convert-blanks
Converts blanks to tabs in a single node.
convert-all-tabs
Converts leading tabs to blanks throughout the selected tree.
convert-all-blanks
Converts leading blanks to tabs throughout the selected tree.
@tabwidth: The convert-* commands convert between tabs and blanks using the @tabwidth setting presently in effect.
insert-body-time and insert-headline-time
Insert formatted time and date into body or headline text. You must be editing a headline to be able to insert the time/date into the headline. The body_time_format_string and headline_time_format_string settings specify the format of the inserted text. These settings are the format string passed to time.strftime.
reformat-paragraph
Rearranges the words in a text paragraph to fill each line as full as possible, up to the @pagewidth setting. A paragraph is delimited by blank lines, Leo directives, and (of course) start and end of text in a node. The width of the line used by the reformatting operation is governed by @pagewidth and the indentation that would be applied to the node when Leo writes the file.
The command operates on the paragraph containing the insert cursor. If the insert cursor is on a blank line or directive, nothing happens. If the cursor is on a line containing text, then the paragraph containing that text line is reformatted and the insert cursor is moved to the next paragraph.
📌 NOTE
Hanging indentation is preserved. This is most useful for bulleted or numbered lists, such as:1. This is the first paragraph,
and it has a hanging indentation.
2. This is the second paragraph,
and it too has a hanging indentation.
replace-current-character
Replace the selected character with the next character typed.
toggle-angle-brackets
Adds or removes double angle brackets from the headline of the selected node.
unformat-paragraph
Removes all extra whitespace from a paragraph, including leading whitespace. This command is useful when @wrap is in effect.
Creating nodes from body text
extract (Ctrl-Shift-D)
Creates a new node whose headline is the first line of selected body text and whose body is all other lines of selected text. Previously selected text is deleted from the original body text.
extract-names (Ctrl-Shift-N)
Creates one or more child nodes, one for each section name in the selected body text. The headline of each created node is the section name.
line-to-headline
Creates a new node whose headline is the selected body line.
Executing scripts in body text
execute-script (Ctrl-B)
Executes body text as JavaScript or TypeScript. Leo execute the selected text, or the entire body text if no text is selected. The Execute Script command pre-defines the values c, g and p as follows:
- c is the commander of the outline containing the script.
- g is the leoGlobals modules.
- p is c.p, that is, c.currentPosition().
In LeoJS, the VSCode API is also available as vscode. Other common modules such as crypto, os, path, process and child_process are also available, along with the following libraries: SQL, JSZip, pako, showdown, dayjs, md5, csvtojson, difflib, elementtree and ksuid.
Important: Body text may contain Leo directives and section references. You can use all of Leo's features to organize scripts that you execute interactively. Section definitions must appear in the node containing the script or in descendant nodes.
Leo preprocesses all scripts by simulating the writing of a external file to a string. The execute-script command sets app.scriptDict["script1"] to the value of the script before preprocessing, and sets app.scriptDict["script2"] to the value of the script after preprocessing. Scripts may examine and change app.scriptDict as they please.
Multiple body editors
open-aside 🖱️ Right-Click on node
Detached Body Panes, independent of the selected node, can be opened with the 'Open Aside' command.
That command is also available when right-clicking on a node in the outline via its context menu.
Undoing changes
Leo supports unlimited undo and redo with the undo (Ctrl-Z) and redo (Ctrl-Shift-Z) commands. (Some commands are not undoable and clear the undo history) Think of actions that may be undone or redone as a string of beads. A "bead pointer" points to the present bead. Performing an operation creates a new bead after the present bead and removes all following beads. Undoing an operation moves the bead pointer backwards; redoing an operation moves the bead pointer forwards. The undo command is disabled when the bead pointer moves in front of the first bead; the redo command is disabled when the bead pointer points to the last bead.
📌 NOTE
In LeoJS, the undo functionality is a multi-tiered system that separates structural outline changes from text changes within the body pane.
File commands
Loading, saving & reverting files
file-open-by-name
Gets the name of a Leo outline from the minibuffer and opens it. File name completion is supported.
new (Ctrl-N)
Creates a new Leo main window.
open-outline (Ctrl-O)
Opens an existing .leo file. Selecting a non-.leo file loads the file into an @edit node in the present outline.
open-outline-by-name
Opens the file given by typing the filename in the minibuffer. Supports filename completion.
read-outline-only
Reads only the .leo file, not any external files.
revert
Reloads the outline, discarding any changes made since it was last saved.
save-all
Saves all open tabs windows/tabs.
save-buffers-kill-leo
Quits Leo, prompting to save any unsaved files first.
save-file or file-save (Ctrl-S)
Saves the Leo window to a file.
save-file-as
Saves a copy of the Leo outline, changing outline's file name.
save-file-to
Saves a copy of the Leo outline, without changing the outline's file name
Opening specific files:
open-my-leo-settings
Opens myLeoSettings.leo in a new tab or window.
open-leo-Settings
Opens default leoSettings.leo in a new tab or window.
Writing external files without saving the outline:
write-at-auto-nodes
Writes all @auto nodes in the selected tree.
write-outline-only
Saves the outline without writing any @<file> trees.
write-at-file-nodes
Writes all @<file> trees.
write-at-shadow-nodes
Writes all @shadow nodes in the selected tree.
write-dirty-at-file-nodes
Writes all modified @<file> trees.
write-dirty-at-shadow-nodes
Writes all modified @shadow trees.
write-missing-at-file-nodes
Write all @<file> nodes for which the corresponding external file does not exist.
Importing & exporting files
export-headlines
Exports all headlines to an external file.
export-html-outline-viewer
Exports the Leo outline as a self-contained HTML interactive outline viewer. This command requires the "leo_to_html_outline_viewer.py" plugin to be active.
file-insert
Prompts for the name of a file and put the selected text into it.
flatten-outline
Creates a text file in MORE format from the selected outline.
import-file
Import a file into an @file node. This command handles files regardless of whether they contain sentinels. This command can also read files in MORE outline format.
import-MORE-file
Import one or MORE files into @file nodes.
import-tabbed-files
Import one or more tab-or-space-delimited files into @file nodes.
import-zim-folder
Imports a zim folder, zim-wiki.org , as the last top-level node of the outline. This command uses the following Leo settings:
@int rst_level = 0
@string rst_type
@string zim_node_name
@string path_to_zim
outline-to-cweb
Creates a CWEB file from the selected outline.
outline-to-noweb
Creates a noweb file from the selected outline.
read-at-auto-nodes
Reads all @auto nodes in the presently selected outline.
read-at-shadow-nodes
Reads all @shadow nodes in the presently selected outline.
read-at-file-nodes
Updates all @<file> nodes in an outline.
read-file-into-node
Prompts for a filename, creates a new node and puts the contents of the file into its body text.
refresh-from-disk
Refreshes an @<file> node from disk.
remove-sentinels
Removes all sentinel lines from a file derived from an @file node.
weave
Formats the selected text and writes it to a file.
write-file-from-node
Writes the body text of the selected node to a file. The command prompts for a file name if the node is not an @<file> node.
Using sessions
session-clear
Closes all tabs except the presently selected tab.
session-create
Creates a new @session node.
session-refresh
Refreshes the current @session node.
session-restore
Opens a tab for each item the selected @session node.
session-snapshot-load
Loads a snapshot of a session from the leo.session file.
session-snapshot-save
Saves a snapshot of the present session to the leo.session file.
A session specifies a list of .leo files that Leo opens automatically when Leo first starts. Leo will reload the last session provided that command-line arguments don't contain any file names.
Creating & deleting directories & files
directory-make
Prompts for the name of a directory and creates it.
directory-remove
Prompts for the name of a directory and deletes it.
file-delete
Prompts for the name of a file and delete it.
Managing recent files
clean-recent-files
Removes duplicate entries from entries in the Recent Files menu.
clear-recent-files
Deletes all entries in the Recent Files except the most recent file. The files themselves are not affected.
sort-recent-files
Sorts the recent files list in the File menu.
Help commands
about-leo
Puts up a dialog box showing the version of Leo.
help
Shows an introduction to Leo's help system.
help-for-command
Prompts for a Leo command name (with auto-completion) and shows the docstring for the command.
help-for-<topic>
Opens a discussion of a topic:
help-for-settingshelp-for-keystrokehelp-for-scriptinghelp-for-minibufferhelp-for-find-commandshelp-for-creating-external-files
open-online-home
Opens the LeoJS home page at https://boltex.github.io/leojs/.
open-online-tutorials
Opens the LeoJS tutorials page at https://boltex.github.io/leojs/docs/getting-started/tutorial-basics.
open-online-videos
Opens LeoJS video playlist at https://www.youtube.com/playlist?list=PLLILWxKl5dBXmdSZqhYEBlK_5AQYNW2xa.
open-users-guide
Opens the LeoJS Users Guide at https://boltex.github.io/leojs/docs/users-guide/leomarkup.
Minibuffer commands
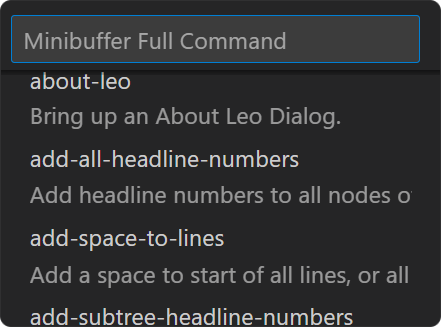
full-command (Alt-X)
Opens the minibuffer input box to execute a command by name.
Outline commands
Creating, cloning & destroying nodes
clone-node (Ctrl-`)
Creates a clone as the immediate sibling of a selected node. The shortcut uses backtick (grave accent), not a single quote.
clone-node-to-last-node
Creates a clone as the last top-level node of the outline.
insert-node (Ctrl-I or Insert)
Inserts a new node into the outline. The new node becomes the first child of the present node if the present node is expanded. Otherwise, the new node becomes the next sibling of the present node.
insert-node-before
Inserts a node before the presently selected node.
delete-node
Deletes a node and all its descendants.
Expanding & contracting nodes
contract-all (Alt-hyphen)
Contracts every node in the outline.
contract-all-other-nodes
Contract all nodes except the parents of the selected node.
contract-node
Contracts a node.
contract-or-go-left (Alt-Left)
Contract the node if it is expanded. Otherwise, select the node's parent.
contract-parent
Select the parent of the selected node and contract it.
expand-all
Expands every node in the outline.
expand-node
Expands a node.
expand-and-go-right (Alt-Right)
Expands a node if not expanded. Otherwise, selects the first child if there is one.
expand-all-subheads
Expand all the direct children of the selected node.
expand-ancestors-only
Expand all the ancestors of the selected node.
These commands expand all descendants of the selected nodes:
expand-next-level
expand-prev-level (reverses expand-next-level)
expand-to-level-1
expand-to-level-2
expand-to-level-3
expand-to-level-4
expand-to-level-5
expand-to-level-6
expand-to-level-7
expand-to-level-8
expand-to-level-9
Editing headlines
edit-headline
Begins editing of the headline of the presently-selected node.
Selecting nodes
Arrow keys: When focus is in the outline pane, you can move about the outline using plain arrow keys. Regardless of focus, Alt-Arrow keys select nodes in the outline pane.
goto-first-sibling
Select the first sibling of the selected node.
goto-last-sibling
Select the last sibling of the selected node.
Similarly, these commands select various nodes in the outline:
go-back
go-forward
goto-char
goto-first-node
goto-first-visible-node
goto-last-node
goto-last-visible-node
goto-line
goto-next-changed
goto-next-clone
goto-next-history-node
goto-next-node
goto-next-sibling
goto-next-visible
goto-parent
goto-prev-history-node
goto-prev-node
goto-prev-sibling
goto-prev-visible
Cutting, pasting & deleting nodes
copy-node (Ctrl-Shift-C)
Copies a node and all its descendants to the clipboard
cut-node (Ctrl-Shift-X)
Copies a node and all its descendants to the clipboard and then delete them.
delete-node
Deletes a node and all its descendants.
paste-node (Ctrl-Shift-V)
Pastes a node and its descendants from the outline. This commands creates copies of nodes, not clones.
past-retaining-clones
Pastes a node and its descendants from the outline. This command preserves the identify (gnx's) of the pasted nodes, thereby preserving any clone links. This command ensures that no newly-pasted node is an ancestor of itself.
Outline representation: When cutting or copying an outline to the clipboard, Leo writes the outline in the same xml (text) format used in .leo files. You may copy this text representation into a body pane (or into any other text editor) using Ctrl-V.
Moving & reorganizing nodes
move-outline-down (Ctrl-D or Shift-Down or Alt-Shift-Down)
Move the selected node down, if possible.
move-outline-left (Ctrl-L or Shift-Left or Alt-Shift-Left)
Move the selected node left, if possible.
move-outline-right (Ctrl-R or Shift-Right or Alt-Shift-Right)
Move the selected node right, if possible.
move-outline-up (Ctrl-U or Shift-Up Alt-Shift-Up)
Move the selected node up, if possible.
Alt Modifiers not needed in the outline pane: When focus is in the outline pane, you can move nodes without adding the Alt modifier. Shift-Up moves the select node up, etc.
Important: The following commands reorganize groups of nodes:
de-hoist
Undoes the effect of the previous hoist command.
demote (Ctrl-])
Makes all following siblings of a node children of the node.
hoist
Redraws the screen so presently selected tree becomes the only visible part of the outline. You may hoist an outline as many times as you wish.
promote (Ctrl-[)
Makes all the children of a node siblings of the node.
sort-children
Sort all children of the children of the present node by their headlines.
sort-siblings (Alt-A)
Sort the present node and all its siblings by their headlines.
Converting between outlines and text
code-to-rst
Format the presently selected node as computer code.
flatten-outline-to-node
Appends the headline and body text of all descendants of the selected node to the body text of the selected node.
parse-body
Parse p.b as source code, creating a tree of descendant nodes. This is essentially an import of p.b.
Marking nodes
copy-marked
Copies all marked nodes as children of a new node.
diff-marked-nodes
When exactly two nodes are marked, this command creates a diff node as the last top-level node whose children are clones of the marked nodes.
goto-next-marked
Selects the next marked node.
mark (Ctrl-M)
Marks node if it is unmarked, and unmarks the node if it is already marked.
mark-changed-items
Marks all nodes whose headline or body text has been changed since the file was last saved.
mark-subheads
Marks all children of the presently selected node.
marked-list
Lists all marked nodes in the Nav pane.
unmark-all
Unmarks all marked nodes in the outline.
Marking groups of nodes: Leo's find and change commands mark nodes if the "Mark Changes" and "Mark Finds" checkboxes are checked. You can change these checkboxes with the toggle-find-mark-changes-option and toggle-find-mark-finds-option commands.
Operations on marked nodes
clone-marked-nodes
Makes clones of all marked nodes and moves them to be children of the present position.
delete-marked-nodes
Deletes all marked nodes.
move-marked-nodes
Moves all nodes to be children of the present position.
Comparing outlines
file-compare-leo-files
Prompts for another (presumably similar) .leo file that will be compared with the presently selected outline file (main window). It then creates clones of all inserted, deleted and changed nodes.
file-diff-files
Creates a node and puts the diff between 2 files into it.
Using Chapters
@chapter trees define chapters. Selecting a chapter makes only those nodes in the chapter visible, much like a hoist. The main chapter represents the entire outline. Selecting the main chapter shows all outline nodes.
chapter-select-main
Selects the main chapter.
chapter-select-<chapter-name>
Each @chapter node in the outline creates a corresponding chapter-select command.
chapter-next
Selects the next chapter.
chapter-back
Selects the previous chapter.
Associated settings:
@bool use_chapters
True: chapters are enabled.
Plugins commands
act-on-node
Executes node-specific action, typically defined in a plugins as follows:
function act_print_upcase(c, p) {
    if (!p.h.startsWith('@up')){
        throw new Error('Try Next');
    }
    p.h = p.h.toUpperCase();
}
g.act_on_node.add(act_print_upcase);
This will upcase the headline when it starts with @up.
Search & spell commands
Basic searches
start-search (Ctrl-F)
Prompts for a search string. Typing the Return key puts the search string in the Find tab and executes a search based on all the settings in the Find tab. Type Tab to enter replacement text.
find-next (F3)
Continues a search started with Ctrl-F.
find-previous (F2)
Searches backwards using the present search options.
replace (Ctrl-=)
Replaces the selected text with the 'change' text in the Find tab.
replace-then-find (Ctrl--)
Replaces the selected text with the 'change' text in the Find tab, then executes the find command again.
Searches creating clones
clone-find-all-flattened aka (cfaf)
Prompts for a find, then creates clones of all found nodes in an organizer node.
clone-find-all aka (cfa)
Same as clone-find-all-flattened, but does not create duplicate cloned nodes. If a node is a descendant of another found node, no duplicate top-level node (in the organizer) is created.
clone-find-marked aka (cfm) and
clone-find-marked-flattened aka (cfmf)
Creates clones of all marked nodes.
clone-find-parents
Creates an organizer node containing clones of all the parents of the selected node.
Batch searches
find-all
Prints all matches in the log pane.
replace-all
Changes all occurrences of the 'find' text with the 'change' text.
Word search and regex search commands
The following commands work like F3 (start-search) with various options set:
search-backward
Searches in the reverse direction.
word-search-backward and word-search-forward
Sets 'Whole Word' checkbox to True.
re-search-forward and re-search-backward
Set the 'Regexp' checkbox to True.
Check boxes and their commands
The following check boxes options appear in the Find pane:
Ignore Case
When checked, the Find and Change commands ignore the case of alphabetic characters when determining matches.
Alt+Ctrl+I (toggle-find-ignore-case-option) toggles this checkbox.
Mark Changes
When checked, the Change command marks all headlines whose headline or body text are changed by the command.
Alt+Ctrl+C (toggle-find-mark-changes-option) toggles this checkbox.
Mark Matches
When checked, the Find and Change commands mark all headlines in which a match is found with the pattern.
Alt+Ctrl+F (toggle-find-mark-finds-option) toggles this checkbox.
Pattern Match
When checked, the Find and Change commands treat several characters specially in the find pattern.
Alt+Ctrl+X (toggle-find-regex-option) toggles this checkbox.
- '*' matches any sequence of zero or more characters.
- '.' matches any single character.
- '^' matches a newline at the start of a pattern.
- '$' matches a newline at the end of a pattern.
Examples:
- "^abc$" matches lines that only contain "abc".
- "^a" matches any line starting with "A".
- "a$" matches any line ending with "a".
- "^*$" matches any line at all.
Search Body Text
When checked, the Find and Change commands search body text.
Alt+Ctrl+B (toggle-find-in-body-option) toggles this checkbox.
Search Headline Text
When checked, the Find and Change commands search headline text.
Alt+Ctrl+H (toggle-find-in-headline-option) toggles this checkbox.
Whole Word
When selected, the find pattern must match an entire word. Words consist of an alphabetic character or underscore, followed by zero or more alphabetic characters, numbers or underscores.
Alt+Ctrl+W (toggle-find-word-option) toggles this checkbox.
Wrap Around
When checked, the Find and Change commands continues at the top of the file when the command reaches the bottom of the file. For reverse searches, the find or change command continues at the bottom of the file when the command reaches the top of the file.
Alt+Ctrl+A (toggle-find-wrap-around-option) toggles this checkbox.
Radio buttons and their commands
The following radio buttons appear in the Find pane:
Entire Outline
When selected, Find commands search the entire outline.
Alt+Ctrl+E (set-find-everywhere) sets this radio button.
Node Only
When selected, Find commands search only the selected node.
Alt+Ctrl+N (set-find-node-only) sets this radio button
Suboutline Only
When selected, the Find and Change commands search only the currently
selected headline and its offspring.
Alt+Ctrl+S (set-find-suboutline-only) sets this radio button.
Settings commands
open-local-settings
Select the @settings node in the present file, if any.
open-myLeoSettings-leo
Open myLeoSettings.leo in a new window.
User Attributes (uA's)
clear-all-uas
command description
clear-node-uas
command description
show-all-uas
command description
show-node-uas
command description
set-ua
command description
Key Reference
Selecting outline nodes
When focus is in the outline pane:
- Right-arrow (expand-and-go-right)
- Left-arrow (contract-or-go-left)
- Up-arrow (goto-prev-visible)
- Down-arrow (goto-next-visible)
Regardless of focus:
- Alt-Home (goto-first-visible-node)
- Alt-End (goto-last-visible-node)
- Alt-Right-arrow (expand-and-go-right)
- Alt-Left-arrow (contract-or-go-left)
- Alt-Up-arrow (goto-prev-visible)
- Alt-Down-arrow (goto-next-visible)
Moving outline nodes
When focus is in the outline:
- Shift-Down-arrow (move-outline-down)
- Shift-Left-arrow (move-outline-left)
- Shift-Right-arrow (move-outline-right)
- Shift-Up-arrow (move-outline-up)
Regardless of focus:
- Alt-Shift-Down-arrow (move-outline-down)
- Alt-Shift-Left-arrow (move-outline-left)
- Alt-Shift-Right-arrow (move-outline-right)
- Alt-Shift-Up-arrow (move-outline-up)
- Ctrl-D (move-outline-down)
- Ctrl-L (move-outline-left)
- Ctrl-R (move-outline-right)
- Ctrl-U (move-outline-up)